authors: [bsmeding] title: Nautobot Zero to Hero – Part 1: Install Nautobot tags: ["network automation", "nautobot", "docker", "installation"] toc: true layout: single comments: true draft: true
Nautobot Zero to Hero – Part 1: Install Nautobot
Install Nautobot with Docker in a Virtual Machine
Get your Nautobot environment up and running with Docker within 5 minutes.
Index
- Nautobot Zero to Hero – Part 1: Install Nautobot
- Install Nautobot with Docker in a Virtual Machine
- Index
- 1. Introduction
- 2. Prerequisites
- 3. Clone the Repository
- 4. Install Nautobot
- 5. Access Nautobot
- 6. Verify Installation
- 7. Wrap-Up
- 8. Next Steps
1. Introduction
In this first part of the series, we'll install Nautobot using Docker in a virtual machine. We'll use the comprehensive installation guide and setup scripts from the nautobot_zero_to_hero repository.
We'll:
- Clone the nautobot_zero_to_hero repository
- Follow the installation instructions
- Deploy Nautobot with Docker Compose
- Verify the installation is working correctly
Estimated Time: ~0.5 hours
2. Prerequisites
- A virtual machine (VM) with:
- Linux (Ubuntu 20.04+ recommended) or macOS/Windows with Docker Desktop
- At least 4GB RAM
- 20GB free disk space
- Docker and Docker Compose installed
- Git installed
- Basic familiarity with command-line operations
3. Clone the Repository
The nautobot_zero_to_hero repository contains everything you need to get started, including Docker Compose files, configuration templates, and installation scripts.
4. Install Nautobot
The repository includes an automated installation script (install.sh) that will:
- Install Docker and Docker Compose (if not already installed)
- Install Containerlab (for network lab setup)
- Update /etc/hosts with lab device hostnames
- Optionally install desktop environment (XFCE, VS Code, Firefox) for GUI support
Option 1: Automated Installation (Recommended)
Standard Installation (Headless):
This installs Docker, Docker Compose, Containerlab, and updates /etc/hosts with lab device hostnames.
Installation with Desktop Environment (Optional):
This includes everything from the standard installation plus: - XFCE desktop environment - Visual Studio Code - Firefox browser - ssh:// protocol handler (for clickable SSH links)
Note: The desktop environment is useful for WSL users or if you want GUI tools. For server installations, use the standard installation.
Option 2: Manual Installation
If you prefer to install manually, follow these steps:
-
Create environment file:
cat > .env << EOF NAUTOBOT_PORT=8080 POSTGRES_DB=nautobot POSTGRES_USER=nautobot POSTGRES_PASSWORD=nautobotpassword SUPERUSER_NAME=admin SUPERUSER_PASSWORD=admin NAUTOBOT_CONTAINER_NAME=nautobot POSTGRES_CONTAINER_NAME=postgres REDIS_CONTAINER_NAME=redis CELERY_BEAT_CONTAINER_NAME=nautobot_celery_beat CELERY_WORKER_CONTAINER_NAME=nautobot_celery_worker_1 NAUTOBOT_DB_HOST=postgres NAUTOBOT_REDIS_HOST=redis EOF -
Start the services:
Important: On first startup, database migrations may take more than 5 minutes. Please be patient!
Note: ARM64 images are now available on Docker Hub, so Apple Silicon (M1, M2, M3, M4) users can use the standard
docker compose up -dcommand without any special configuration.
- Wait for services to be healthy:
All services should show as "healthy" or "running" before proceeding.
5. Access Nautobot
Once the installation is complete, you can access Nautobot:
- URL:
http://localhost:8080(or the port configured in your.envfile) - Alternative URL:
http://nautobotlab.dev:8080(if you raninstall.shwhich updates/etc/hosts) - Default Username:
admin - Default Password:
admin(change this immediately!) - Default API Token:
1234567890abcde0987654321(found in user profile)
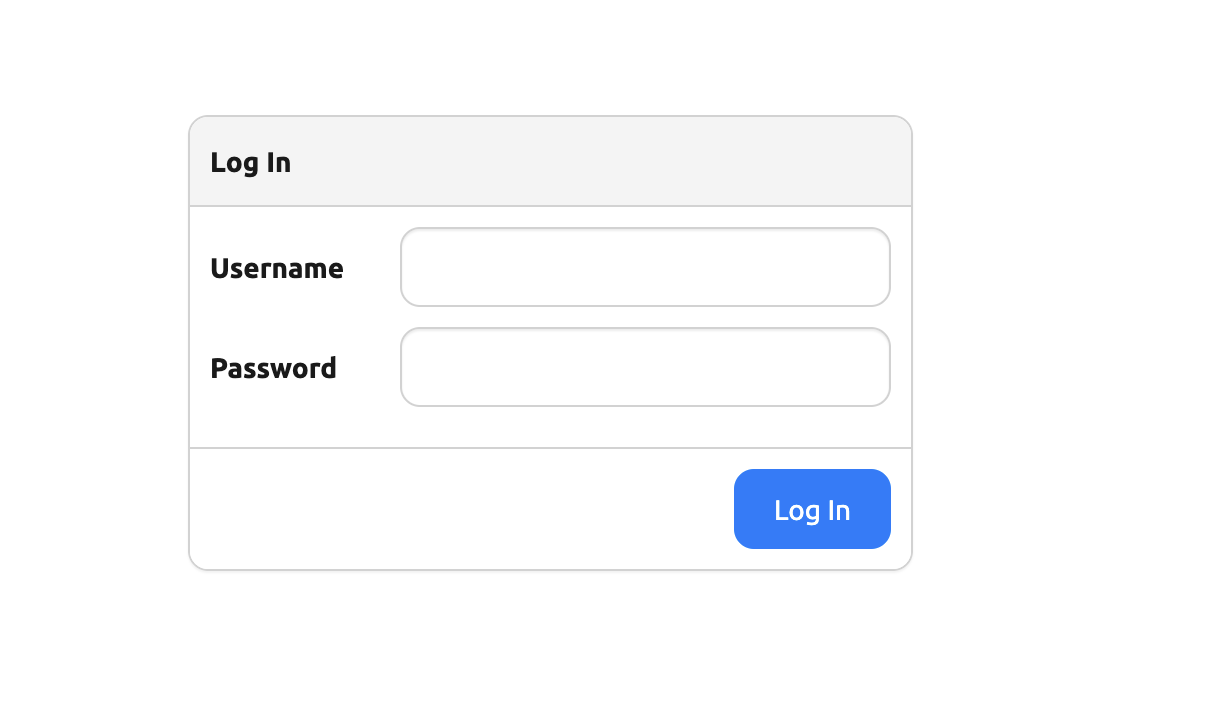
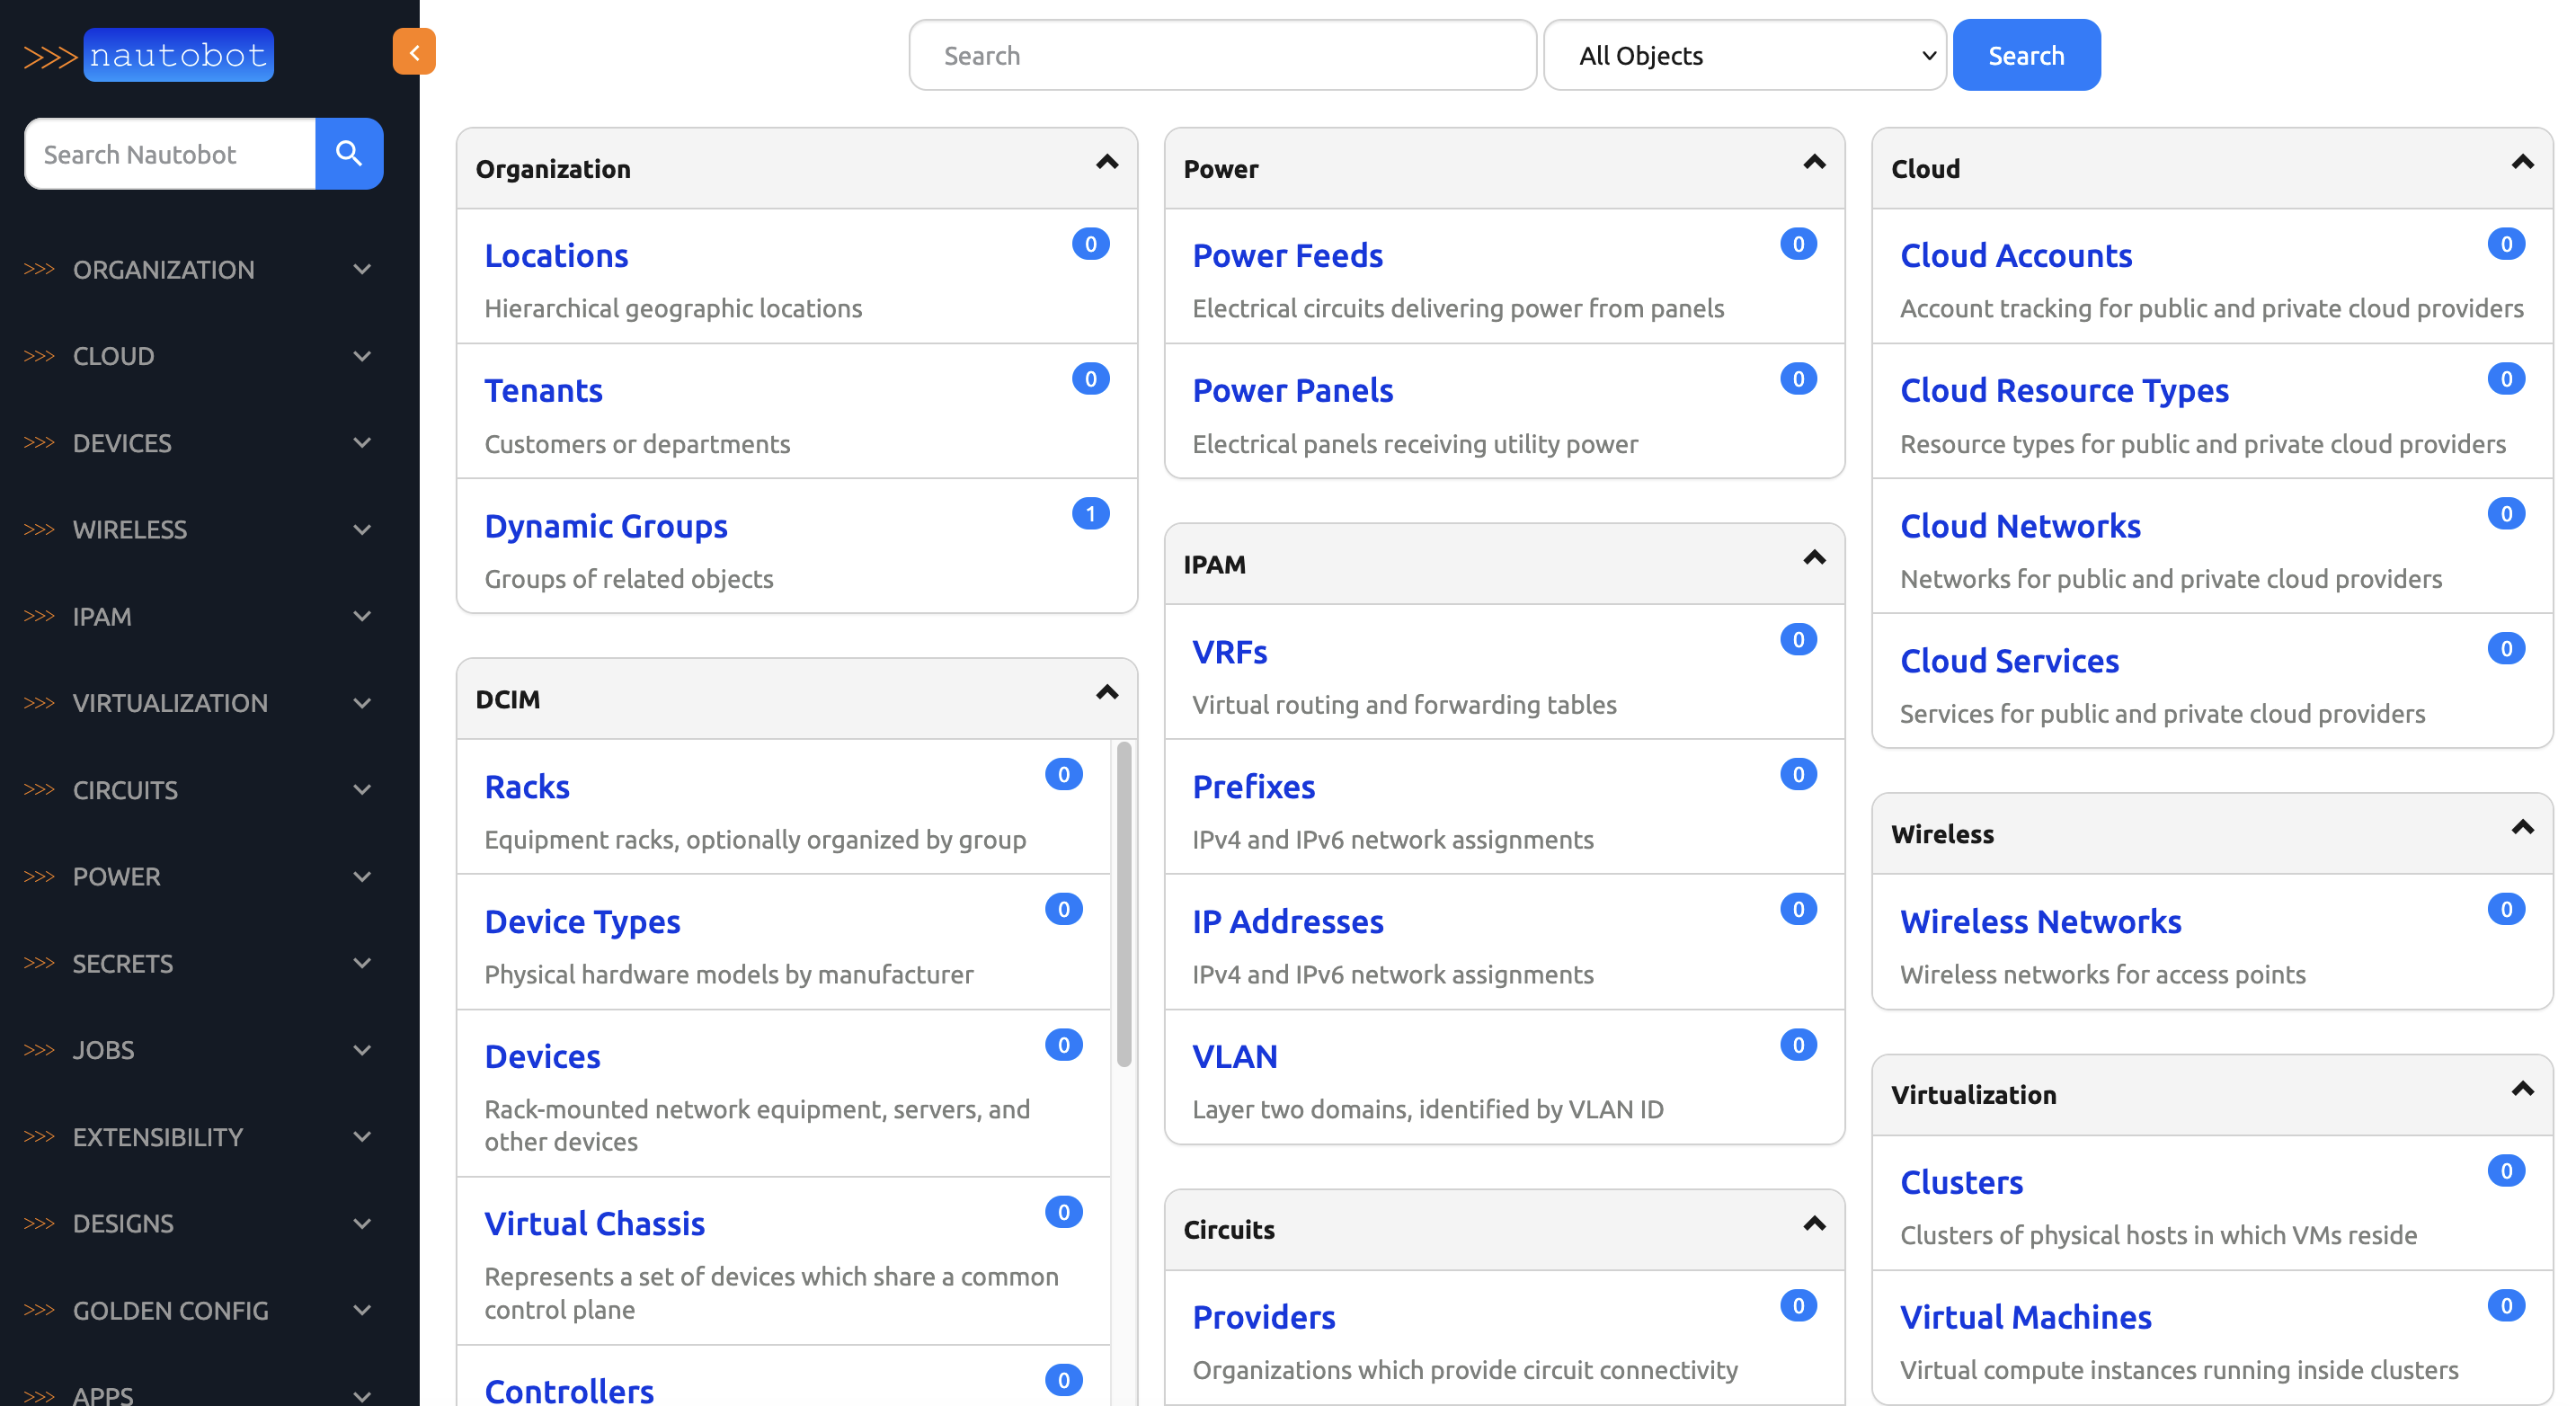
After logging in, you should see the Nautobot dashboard.
6. Verify Installation
Let's verify that all components are working correctly:
Check Service Status
All services should show as "healthy" or "running":
nautobot- Main Nautobot applicationpostgres- PostgreSQL databaseredis- Redis cache and message brokercelery-worker-1- Background job workercelery-beat- Scheduled task scheduler

Check Nautobot Health
You should see a JSON response indicating all services are healthy.
Access the API
Replace YOUR_API_TOKEN with your API token (found in your user profile). Default: '1234567890abcde0987654321'
7. Wrap-Up
Congratulations! You have successfully: - ✅ Installed Nautobot with Docker - ✅ Set up PostgreSQL and Redis - ✅ Configured Celery workers for background jobs - ✅ Accessed the Nautobot web interface - ✅ Verified all services are running
8. Next Steps
Now that Nautobot is installed and running, proceed to Part 2: Getting Started with Nautobot to:
- Explore what Nautobot can do
- Deploy a demo environment using Jobs
- Run the pre-flight job to create initial data
Happy automating! 🚀